
Create your first GPT-4 App
In this tutorial, you’ll use GPT-4 and Humanloop to quickly create a GPT-4 chat app that explains topics in the style of different experts.
At the end of this tutorial, you’ll have created your first GPT-4 app. You’ll also have learned how to:
- Create a project using the Humanloop Playground
- Use the Humanloop SDK to call Open AI GPT-4 and log your results
- Capture feedback from your end users to evaluate and improve your model.
This tutorial picks up where the Quick Start left off. If you’ve already followed the quick start you can skip to step 4.
In this tutorial, you'll build a simple GPT-4 app that can explain a topic in the style of different experts.
1. Open the Humanloop Playground
When you first open the playground you’ll be prompted to enter your OpenAI API Key. You can do that by going here and copying the API key.
If you don’t already have an OpenAI account, you’ll need to create one. Paste your key into the box in the Humanloop app.
Using the Humanloop playground will use your OpenAI credits in the same way that the OpenAI playground does.
2. Create a prompt template
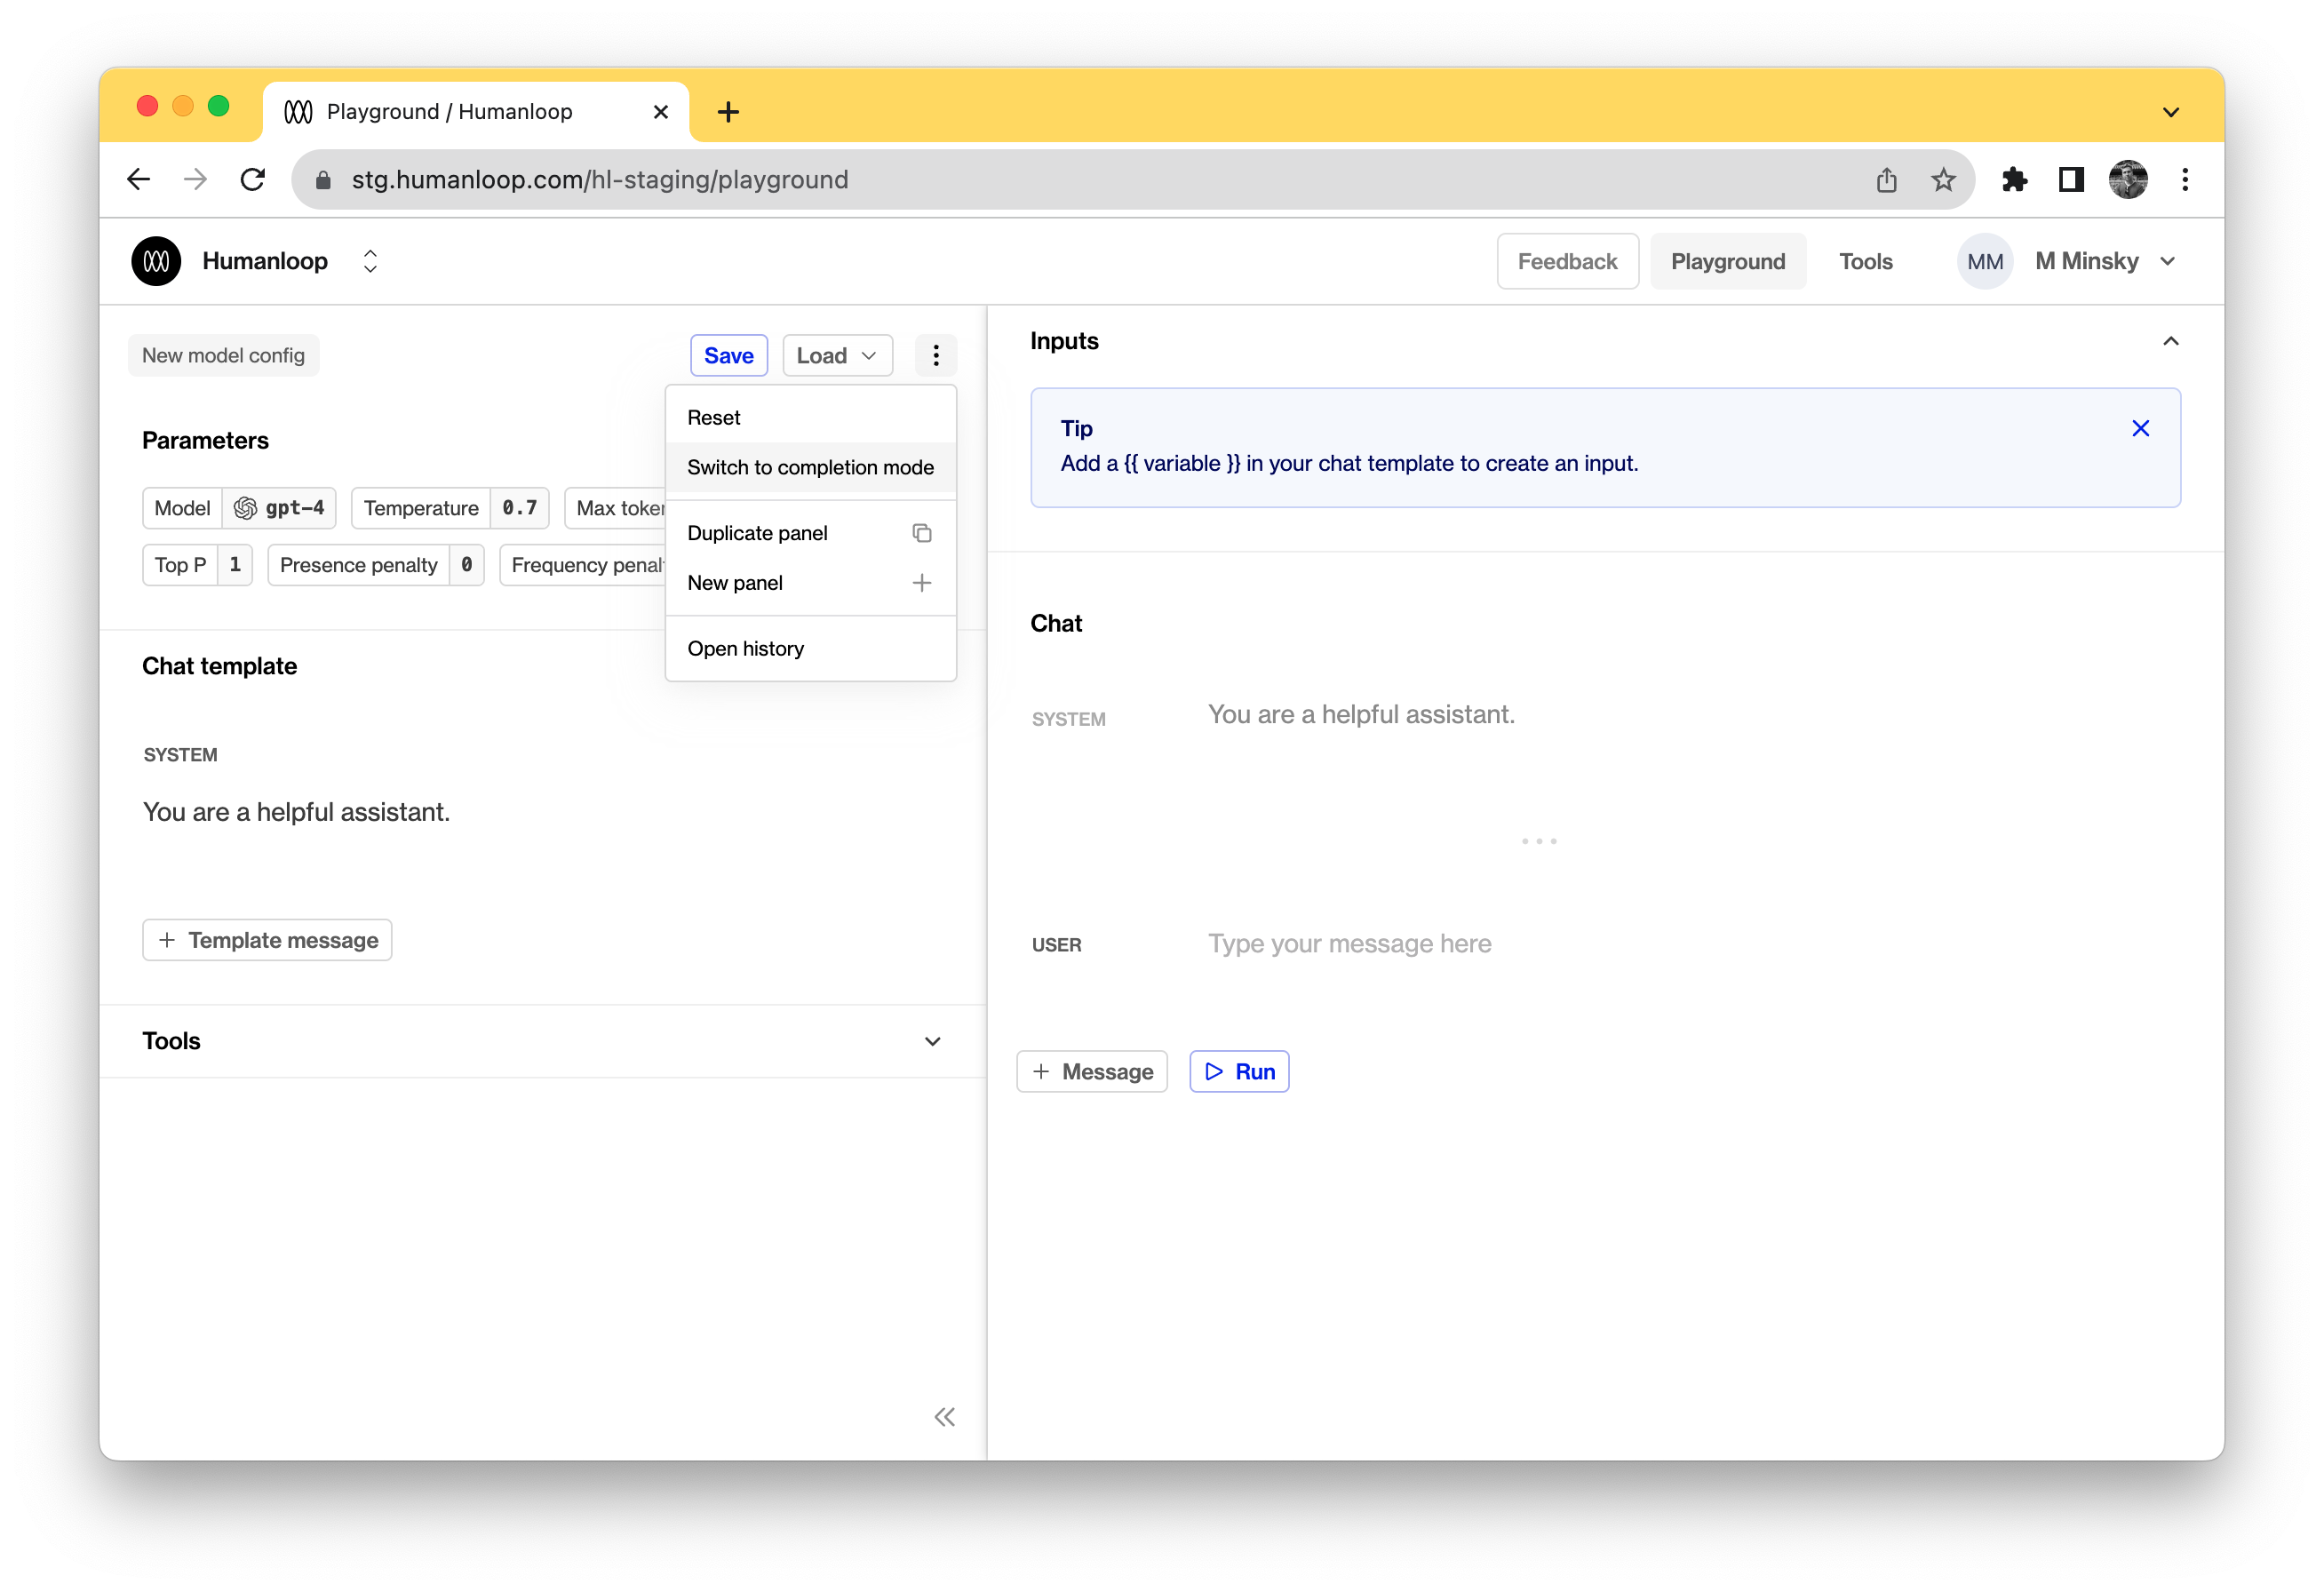
First switch to completion mode in the playground by opening the dropdown menu in the config pane. Select Switch to completion mode.
Copy the following text into the prompt box on the left-hand-side of the playground, and overwrite any text that is already there.
Write a short article about {{topic}} as written by {{expert}}:
This sentence is an example of a prompt template. It’s an instruction to GPT-4 but with slots for user input.
The slots are surrounded by two curly braces. On the right side of the page, you’ll now see three boxes with inputs for “expert” and “topic”.
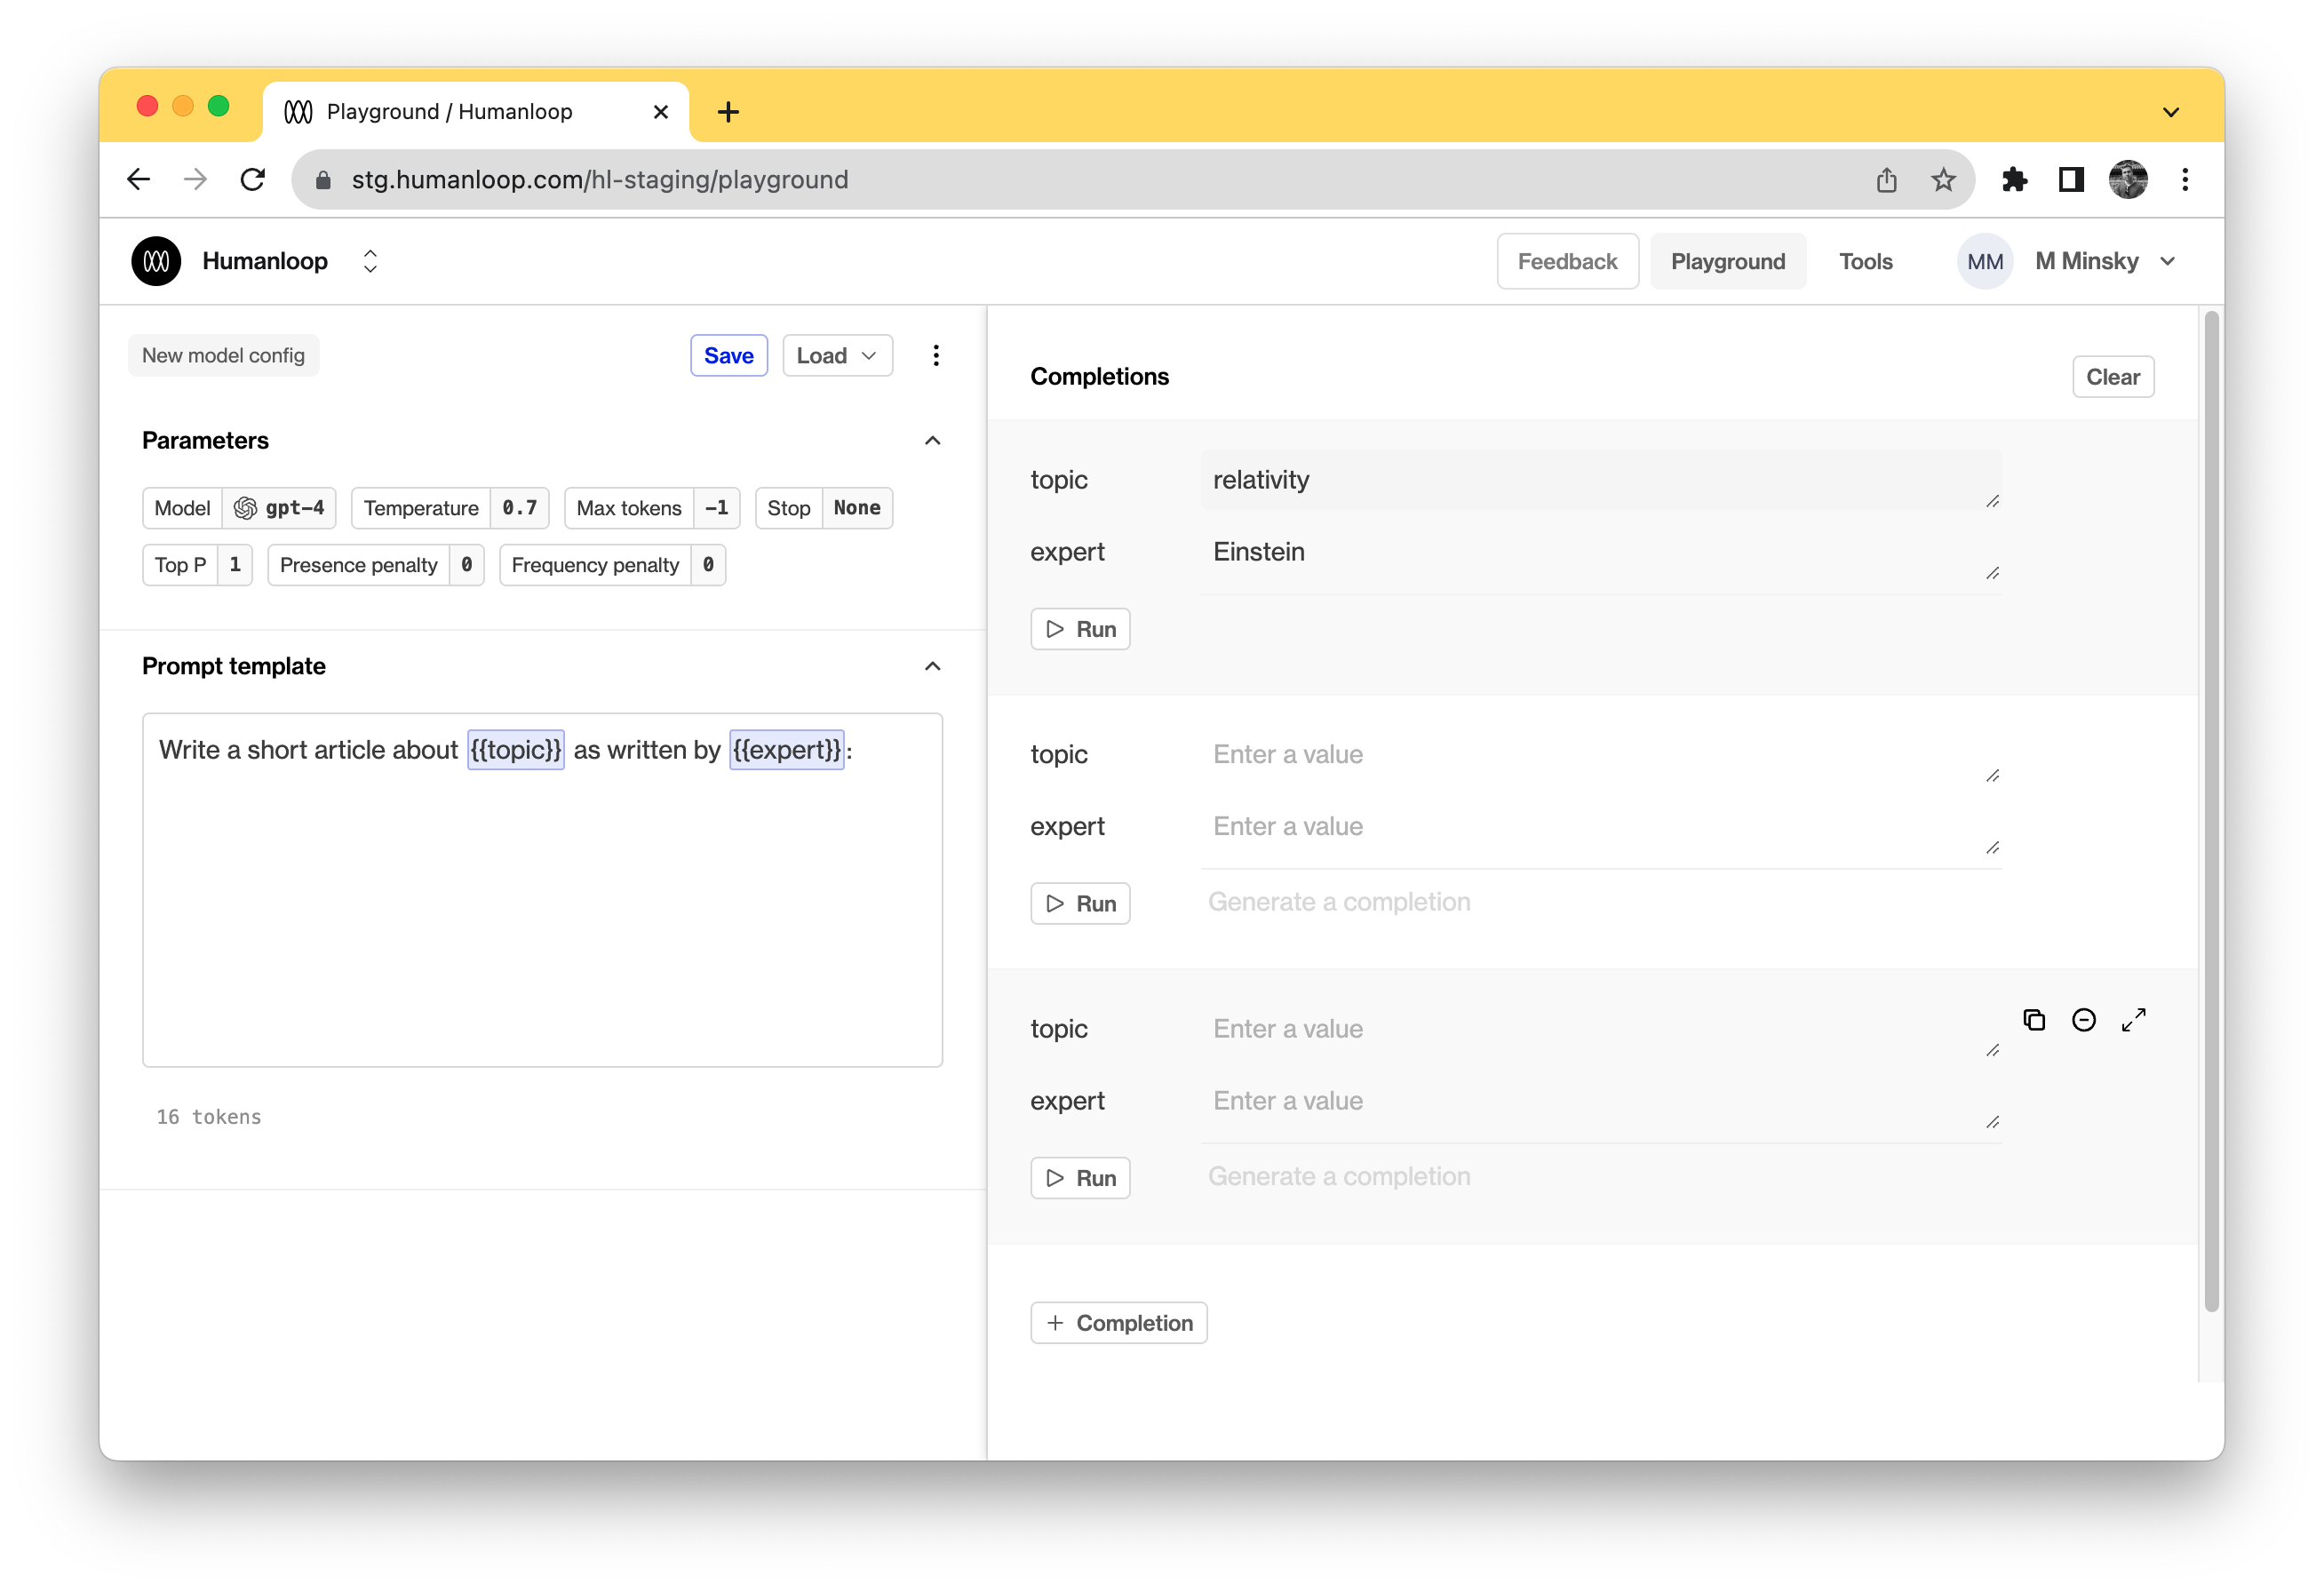
- For the top set of the input boxes enter a famous person. Suggestions: Einstein, David Beckham, Elon Musk
- Put in a different topic in the "topic" box. Suggestions: relativity, football, spaceships
- Click Run in the same section of the inputted topic and expert on right side of the page.
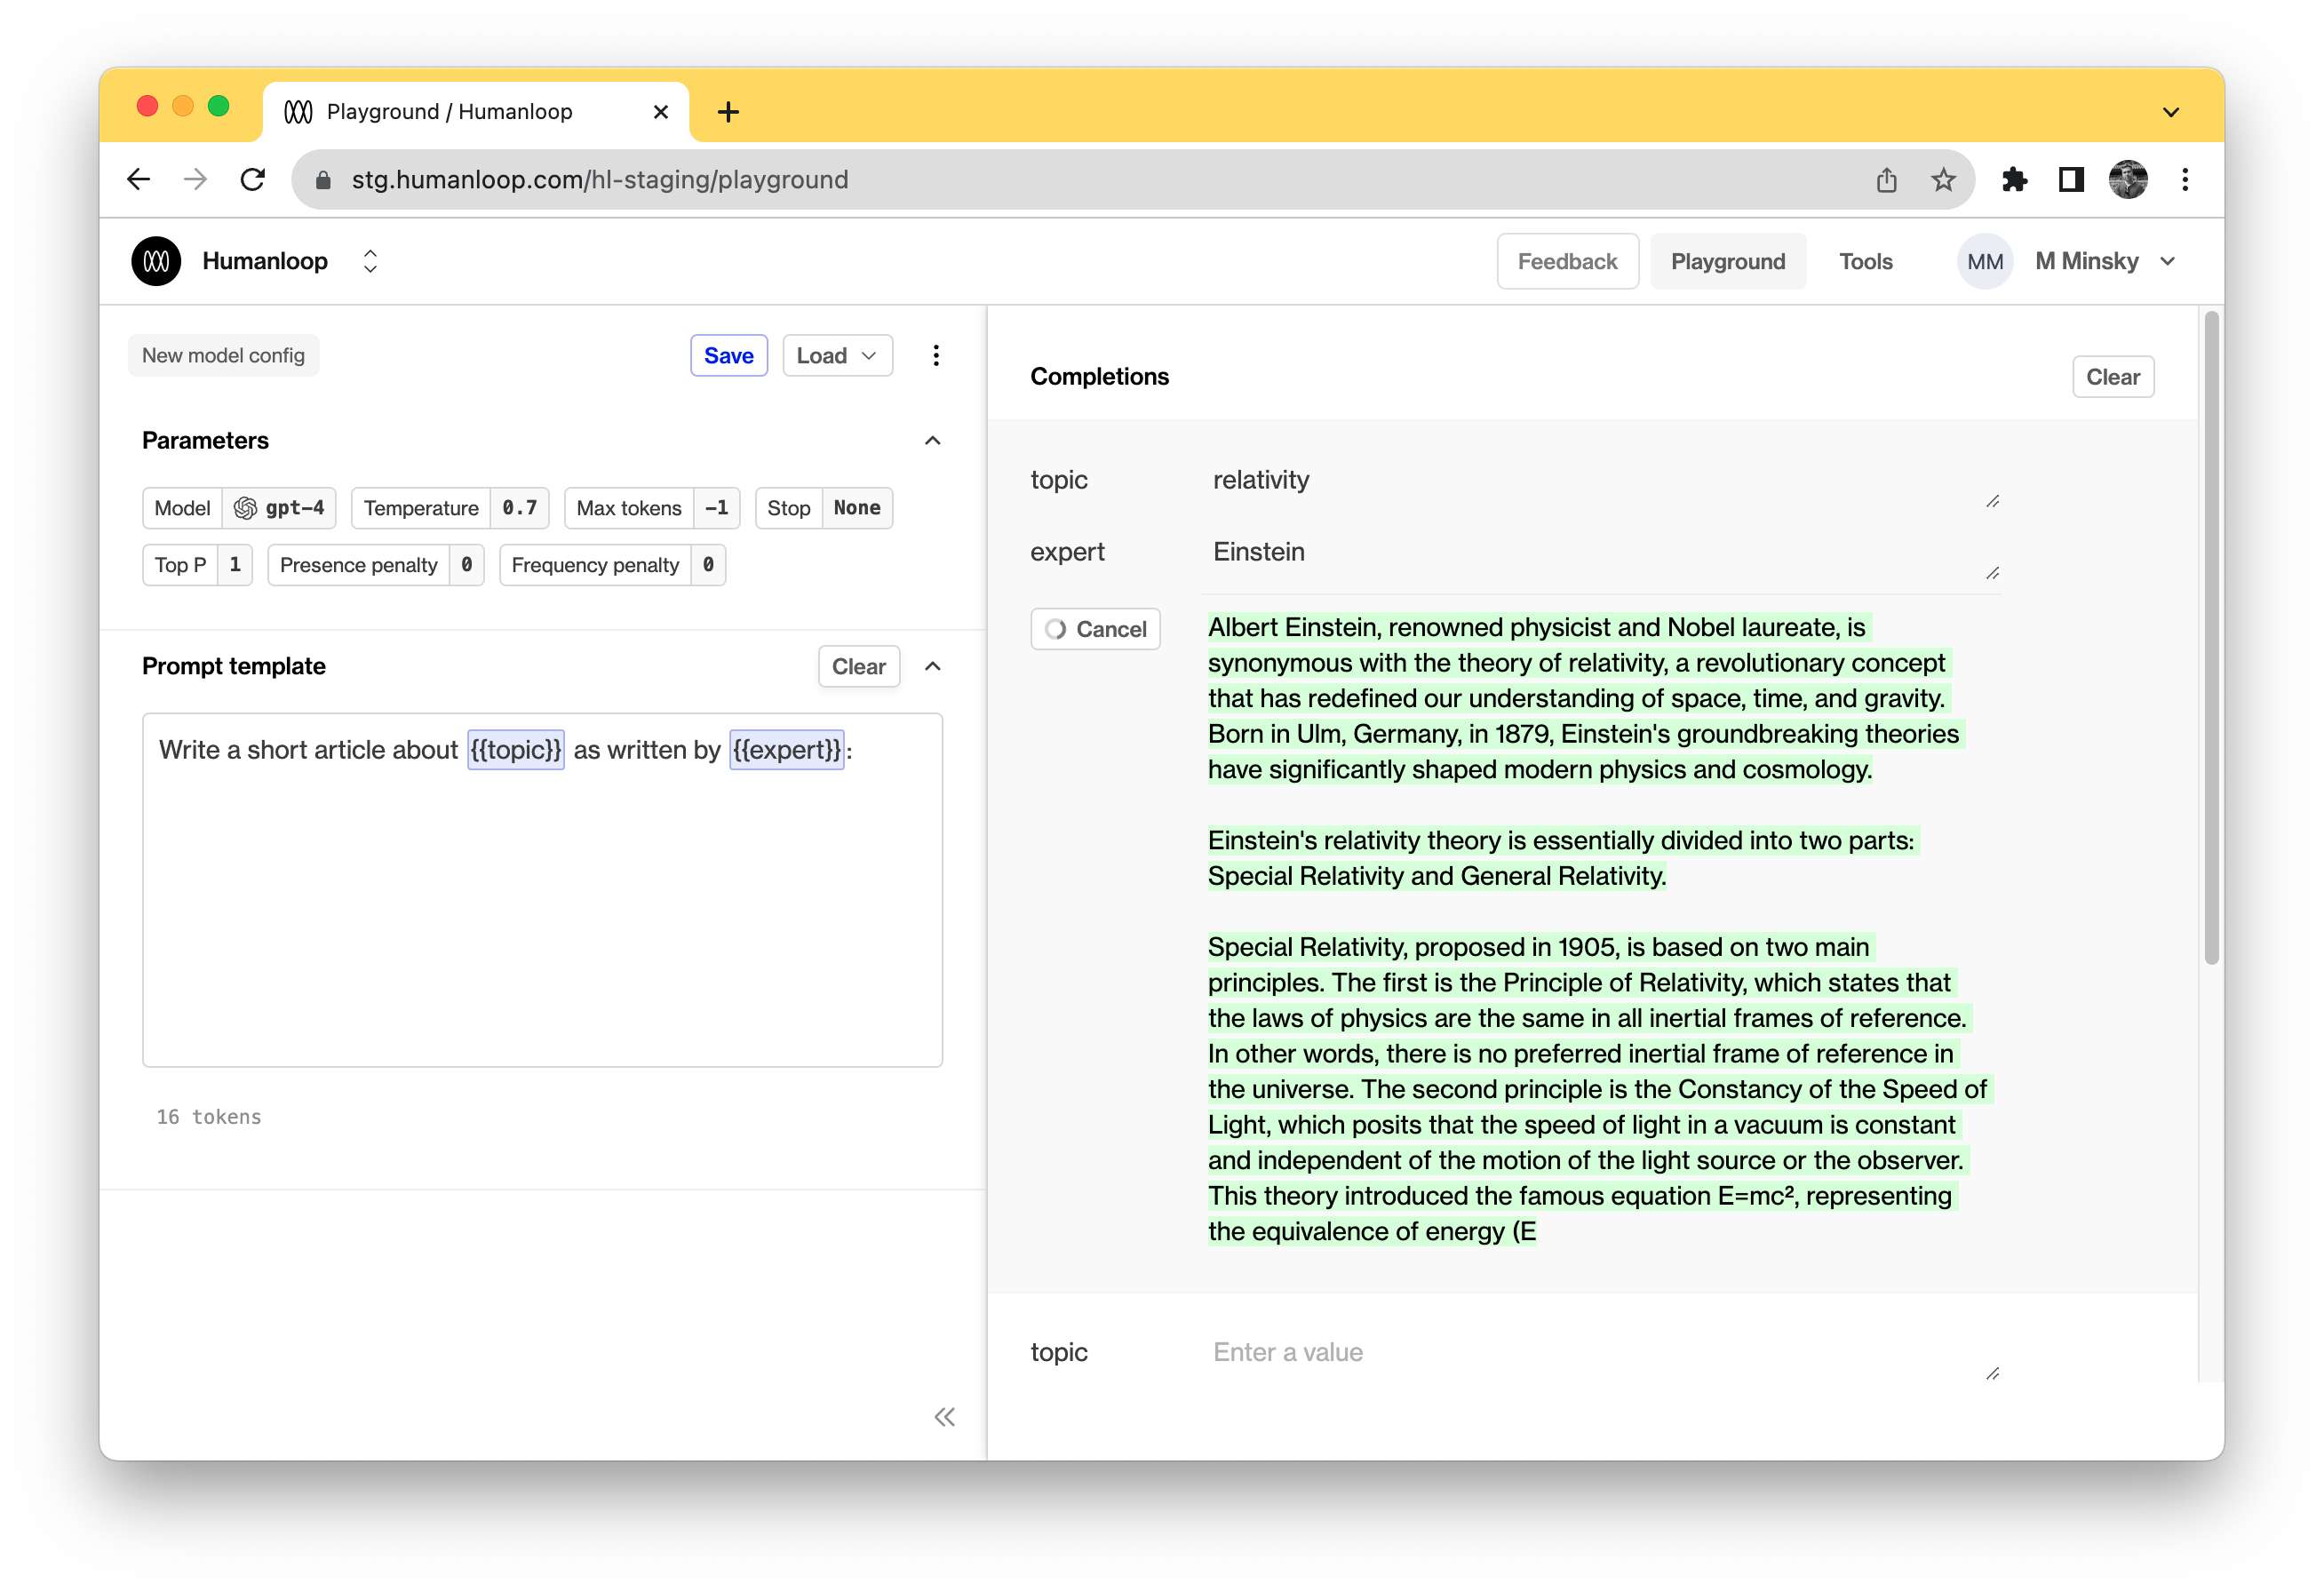
This will call GPT-4 and return answers for each of the input groups you have.
Click Run a few times to get a sense of the different possible outputs. Try changing the temperature on the left panel and see what impact it has.
3. Create your first project
You now have a first prompt-template that you might want to use in an app. To create a project:
- Click Save
- Click or create new project
- Enter a Project name of "learn anything" and set the Model config name as "expert-topics"
- Click Create project
- Now go to your project by clicking the Open in project editor button. Thats it!
4. Add the model to an app
Now that you’ve found a good prompt and settings, you’re ready to build the "Learn anything from anyone" app! We’ve written some code to get you started — follow the instructions below to download the code and run the app.
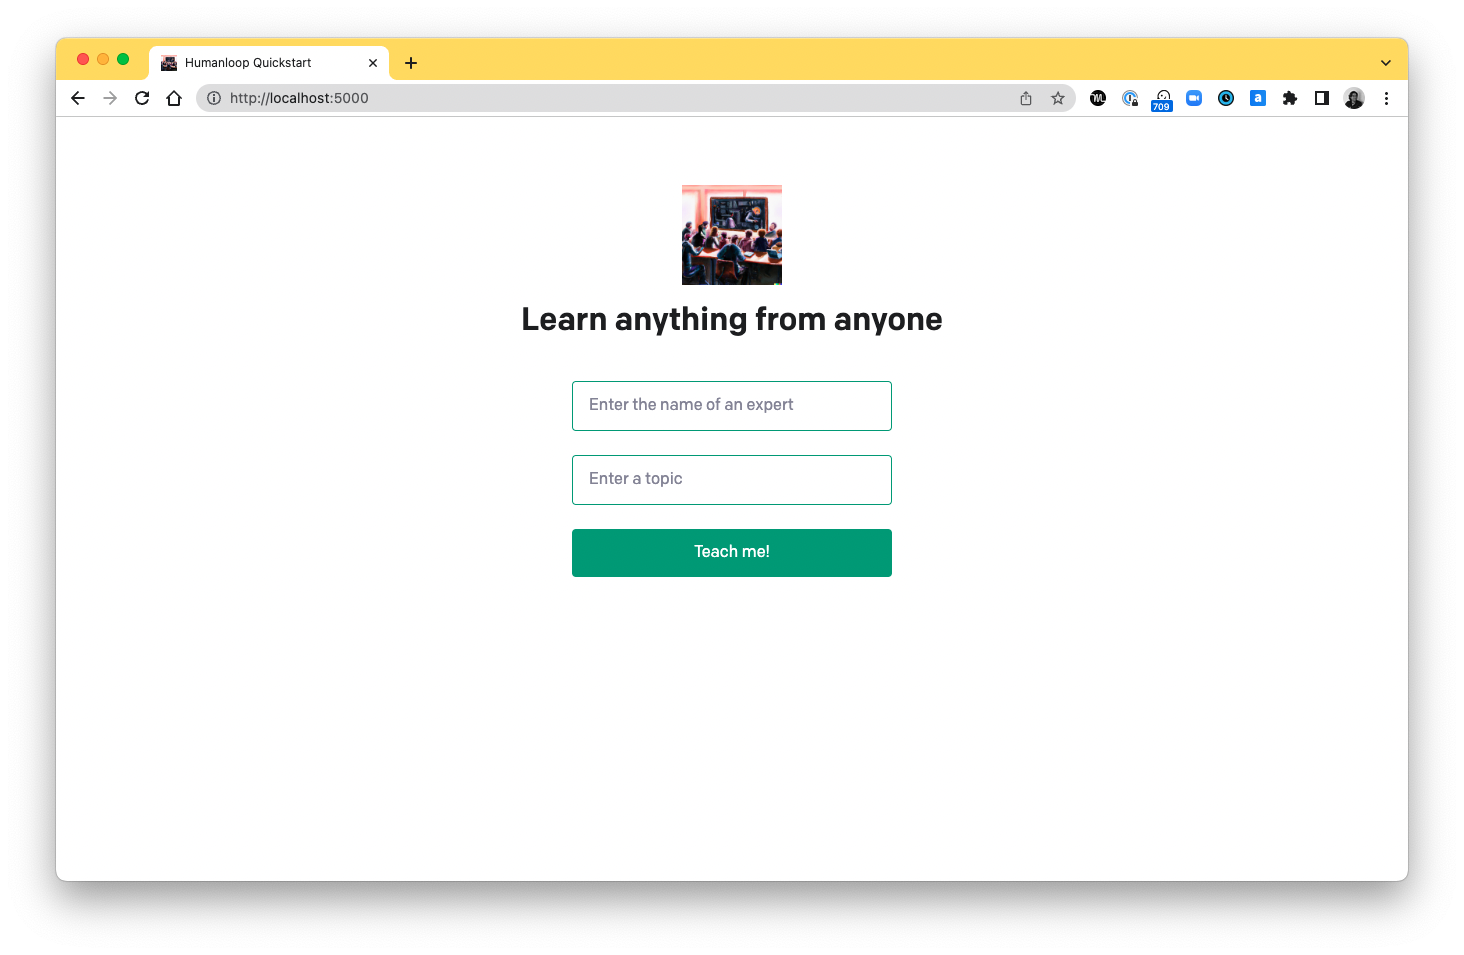
When you run the app, this is what you should see.
Setup
If you don’t have Python 3 installed, install it from here. Then download the code by cloning this repository in your terminal:
git clone [email protected]:humanloop/humanloop-tutorial-python.git
If you prefer not to use git, you can alternatively download the code using this zip file.
In your terminal, navigate into the project directory and make a copy of the example environment variables file.
cd humanloop-tutorial-python
cp .example.env .env
Copy your Humanloop API key and set it as HUMANLOOP_API_KEY in your newly created .env file. Copy your OpenAI API key and set it as the OPENAI_API_KEY.
Run the app
Run the following commands in your terminal in the project directory to install the dependencies and run the app.
python -m venv venv
. venv/bin/activate
pip install -r requirements.txt
flask run
Open http://localhost:5000 in your browser and you should see the app. If you type in the name of an expert, e.g "Aristotle", and a topic that they're famous for, e.g "ethics", the app will try to generate an explanation in their style.
Press the thumbs-up or thumbs-down buttons to register your feedback on whether the generation is any good.
Try a few more questions. Perhaps change the name of the expert and keep the topic fixed.
5 View the data on Humanloop
Now that you have a working app you can use Humanloop to measure and improve performance. Go back to the Humanloop app and go to your project named "learn-anything".
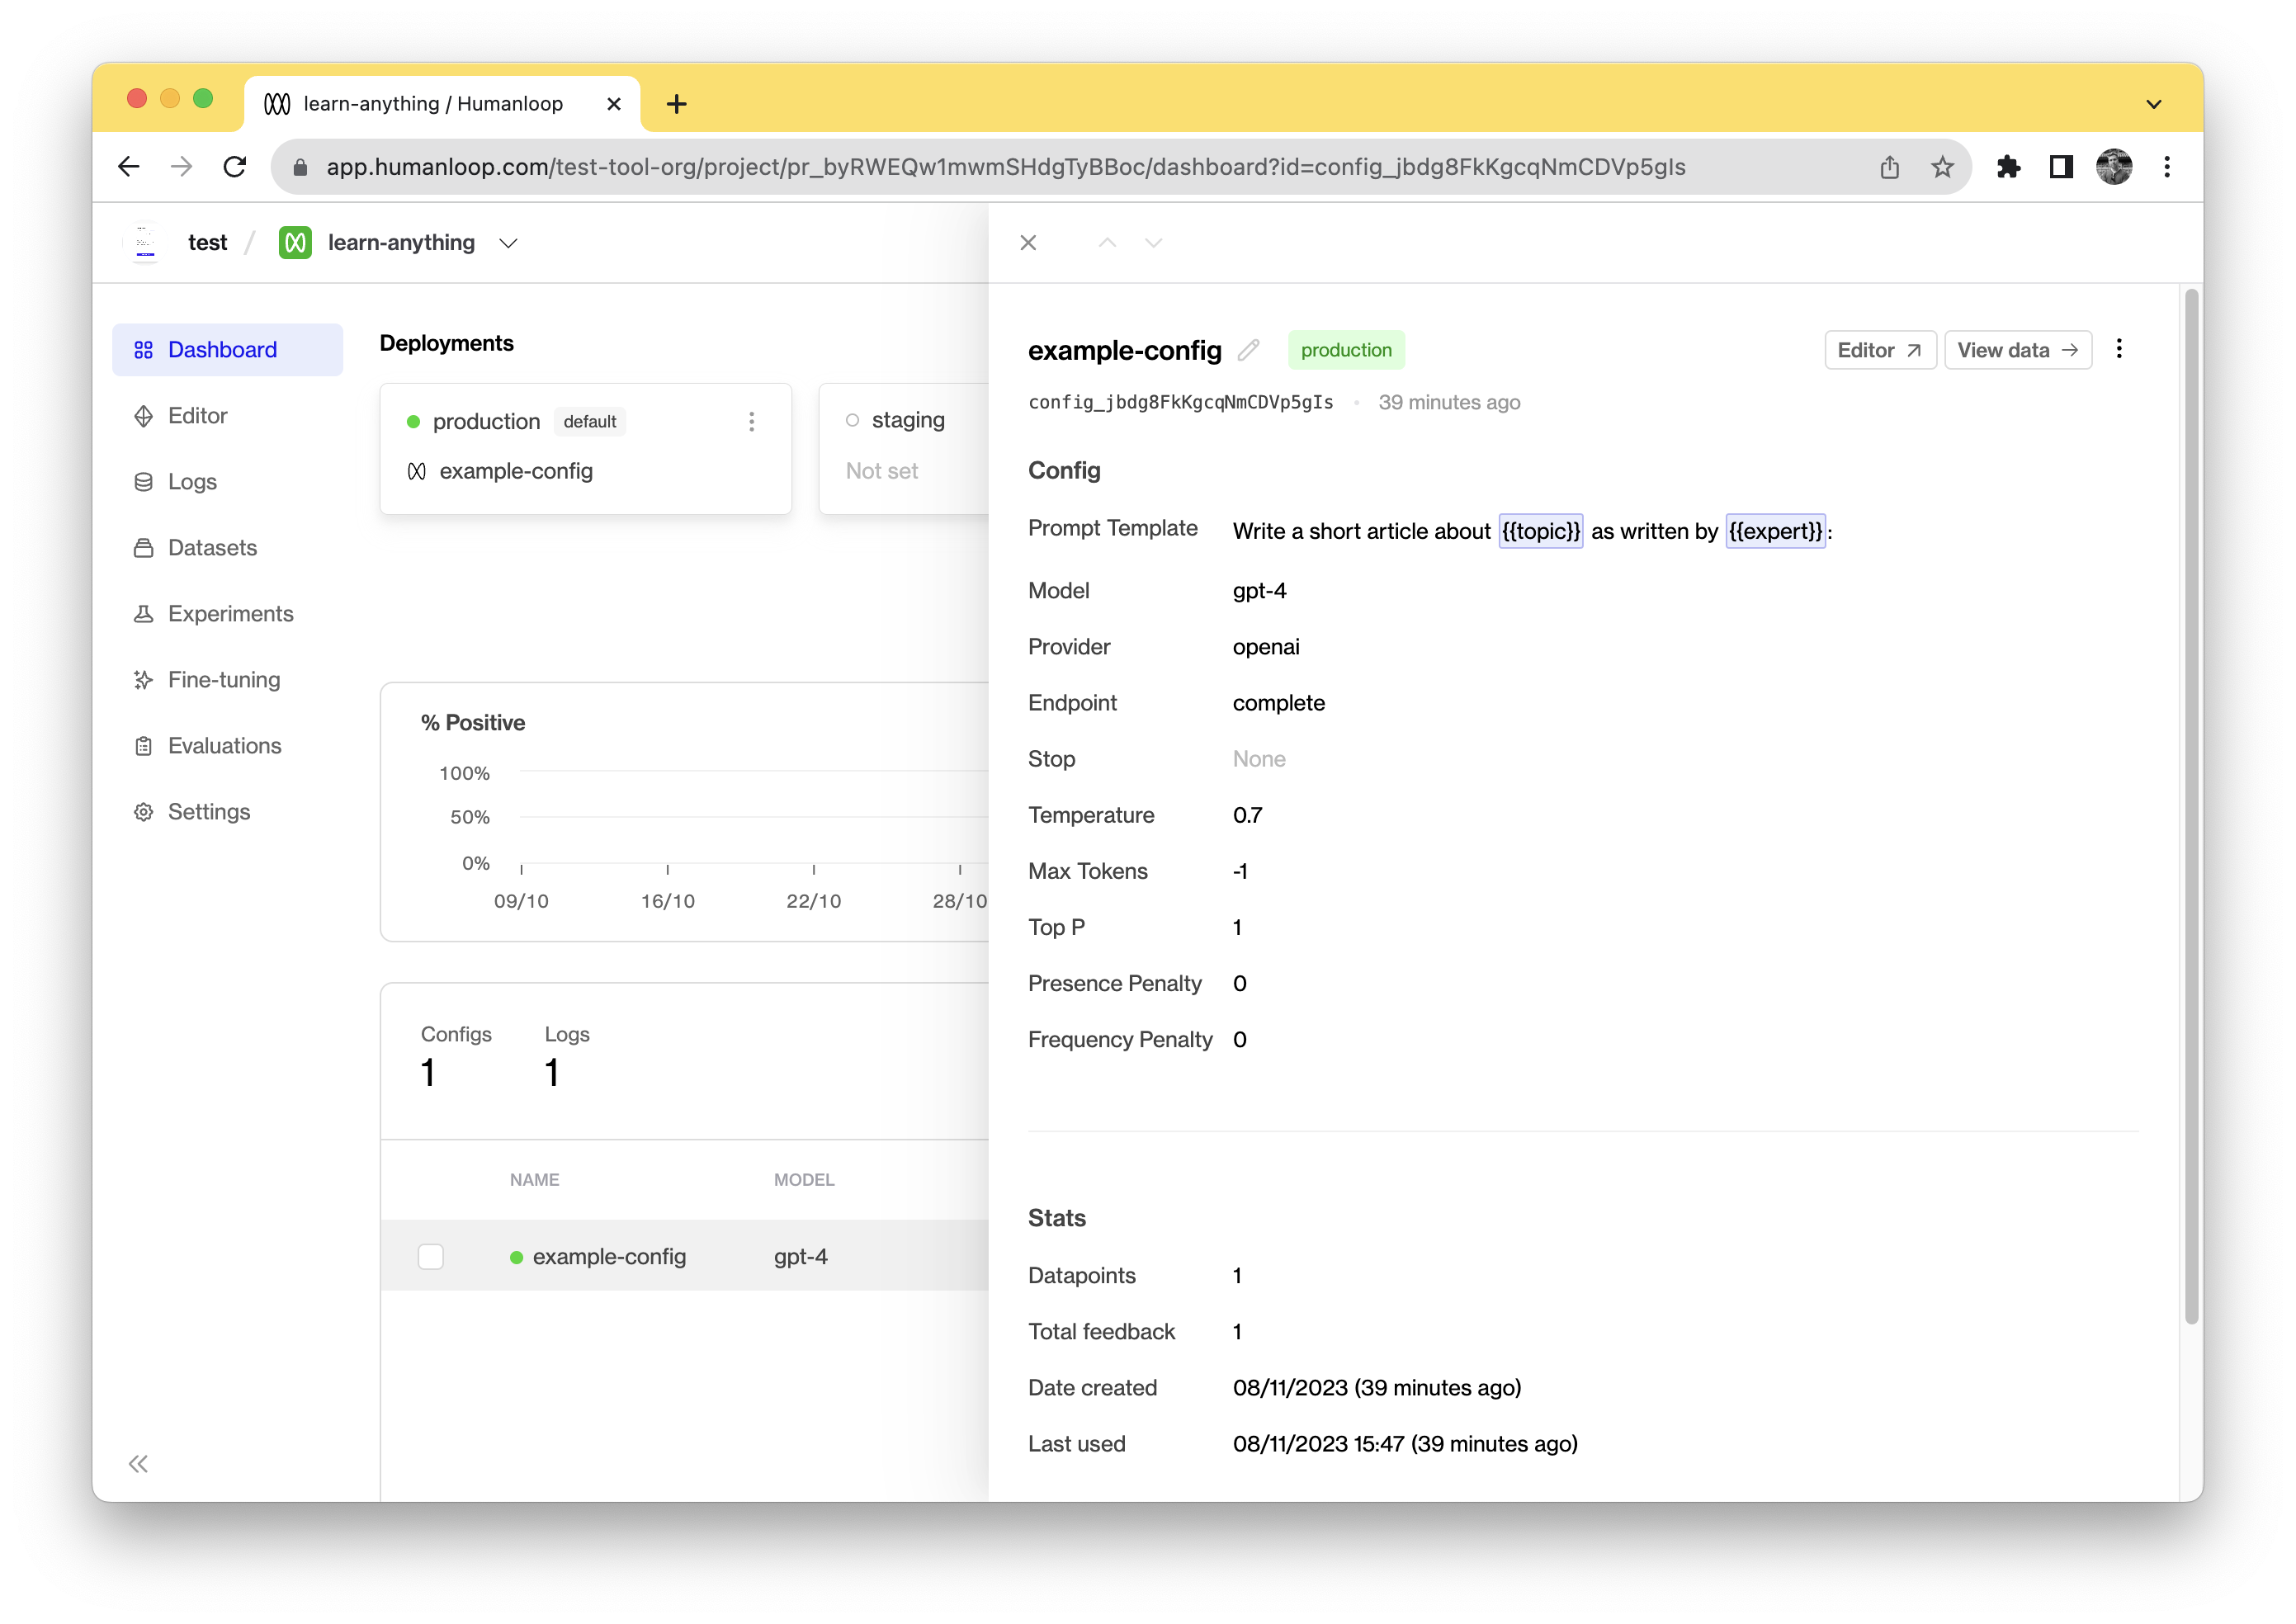
On the Models dashboard you'll be able to see how many data points have flowed through the app as well as how much feedback you've received. Click on your model in the table at the bottom of the page.
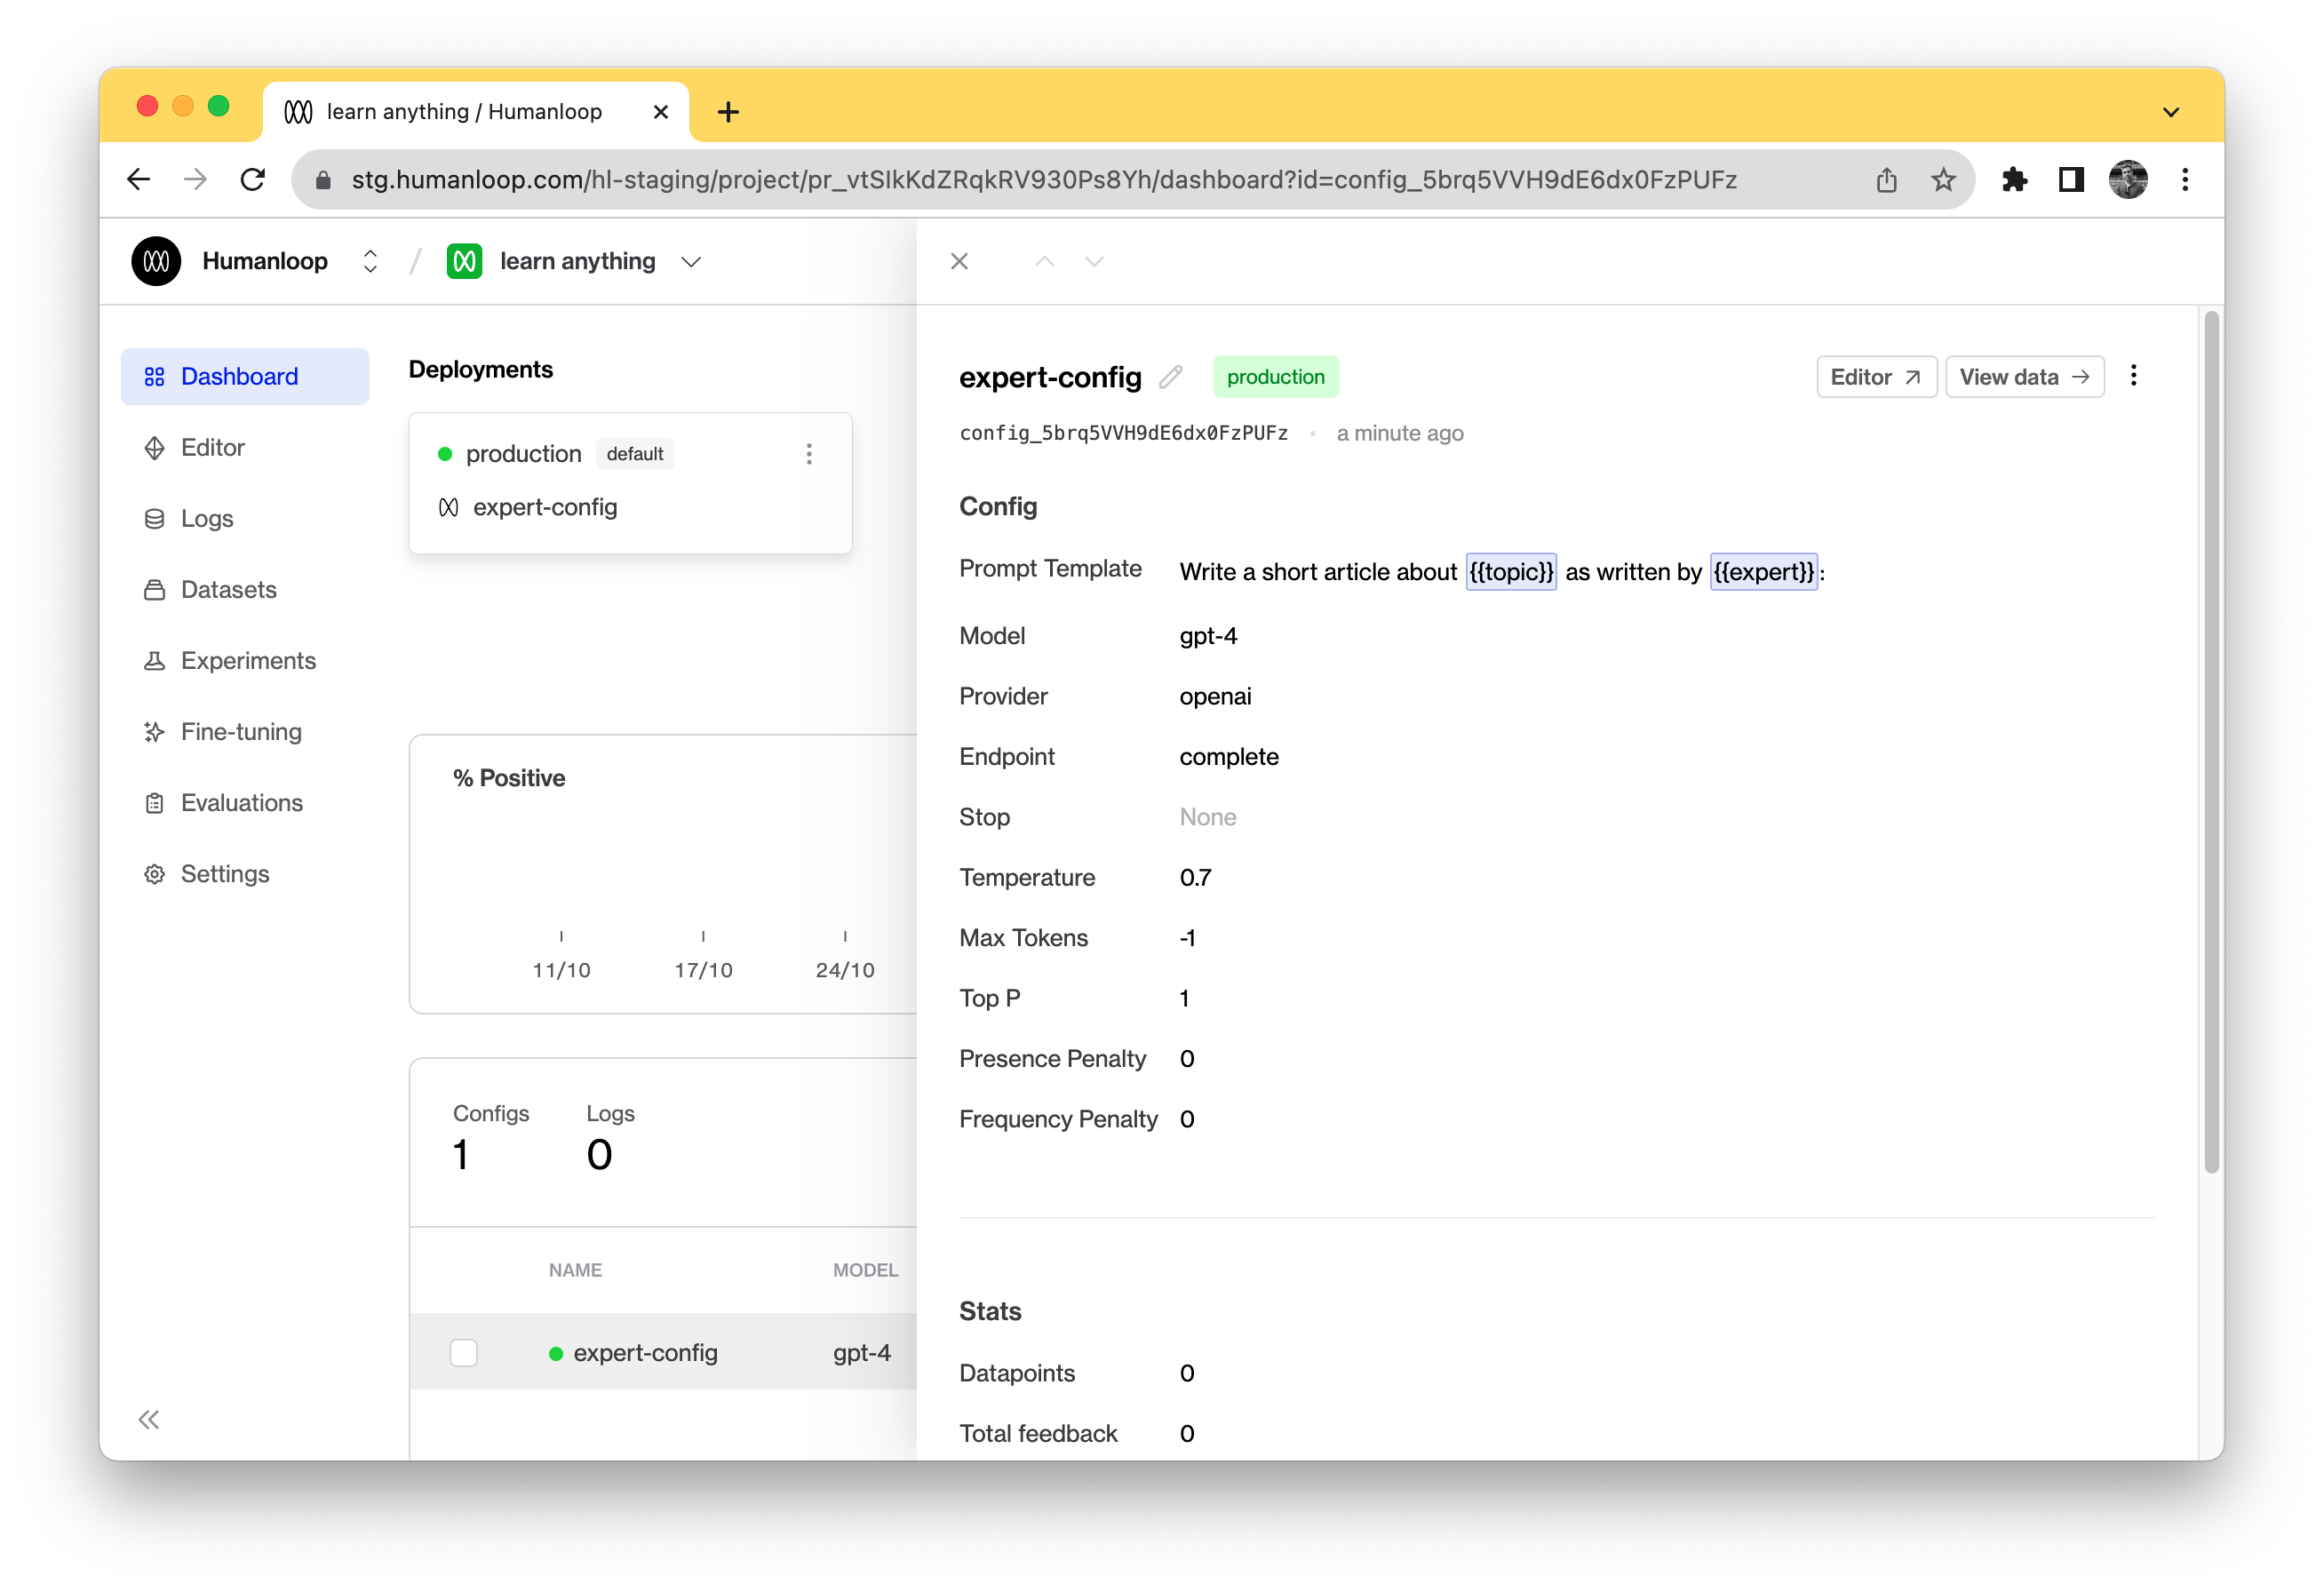
Click View data in the top right. Here you should be able to see each of your generations as well as the feedback that's been logged against them. You can also add your own internal feedback by clicking on a datapoint in the table and using the feedback buttons.
6 Understand the code
Open up the file app.py in the "openai-quickstart-python" folder. There are a few key code snippets that will let you understand how the app works.
Between lines 30 and 41 you'll see the following code.
expert = request.form["Expert"]
topic = request.form["Topic"]

# hl.complete automatically logs the data to your project.
complete_response = humanloop.complete_deployed(
  project="learn-anything",
  inputs={"expert": expert, "topic": topic},
  provider_api_keys={"openai": OPENAI_API_KEY}
)

data_id = complete_response.body["data"][0]["id"]
result = complete_response.body["data"][0]["output"]
On line 34 you can see the call to humanloop.complete_deployed which takes the project name and project inputs as variables. humanloop.complete_deployed calls GPT-4 and also automatically logs your data to the Humanloop app.
In addition to returning the result of your model on line 39, you also get back a data_id which can be used for recording feedback about your generations.
On line 51 of app.py, you can see an example of logging feedback to Humanloop.
# Send feedback to Humanloop
humanloop.feedback(type="rating", value="good", data_id=data_id)
The call to humanloop.feedback uses the data_id returned above to associate a piece of positive feedback with that generation.
In this app there are two feedback groups rating (which can be good or bad) and actions, which here is the copy button and also indicates positive feedback from the user.
7 Add a new model config
If you experiment a bit, you might find that the model isn't initially that good. The answers are often too short or not in the style of the expert being asked. We can try to improve this by experimenting with other prompts.
-
Click on your model on the model dashboard and then in the top right, click Editor
-
Edit the prompt template to try and improve the prompt. Try changing the maximum number of tokens using the Max tokens slider, or the wording of the prompt.

Here are some prompt ideas to try out. Which ones work better?
{{expert}} recently gave a lecture on {{topic}}.
Here is a transcript of the most interesting section:
If {{expert}} explained {{topic}} to a 10 year old, they would likely say:
Write an essay in the style of {{expert}} on {{topic}}
-
Click Save to add the new model to your project. Add it to the "learn-anything" project.

-
Go to your project dashboard. At the top left of the page, click menu of "production" environment card. Within that click the button Change deployment and set a new model config as active; calls to
humanloop.complete_deployedwill now use this new model. Now go back to the app and see the effect!

8 Go home happy!
And that’s it! You should now have a full understanding of how to go from the Humanloop playground to a deployed and functioning app. You've learned how to create prompt templates, capture user feedback and deploy a new model from the playground.
If you want to learn how to improve your model by running experiments or finetuning check out our guides below.
Updated 5 months ago
If you want to learn how to improve your model by running experiments check out our guides below.